How can we help?
How to change the battery on an RT 6-3000 or RT 6000
23 June 2021
You shouldn’t need to change your battery regularly on an RT 6-3000 or RT 6-6000 due to the magnetic battery disconnect switch and also the 32 month lithium battery. However if you do need to, consult our manuals or follow this knowledge base.
This guide covers both the RT 6-3000 and RT 6-6000.
Procedure for replacing a battery
1. Firstly clean the RT6 with clean fresh water and remove any growth.
2. Check the pressure relief valve is flush and screw an M4 bolt into the pressure relief valve to relieve pressure.
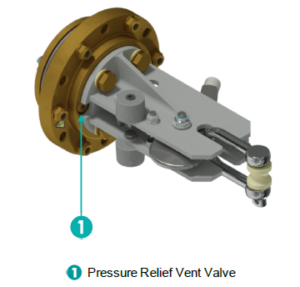
3. Remove the six M8 external cage retaining nuts and washers.
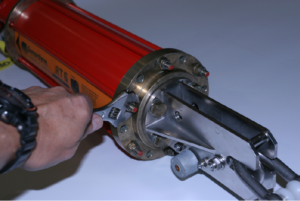
4. Carefully slide the external cage through the retaining holes and remove the housing.
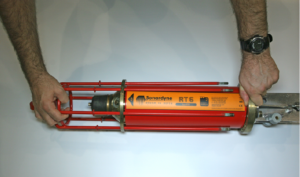
5. Carefully lever the end cap using a Sonardyne Opening Tool (provided)
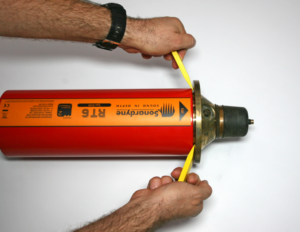
6. Disconnect the following leads and connectors:
1.Chassis bonding lead from endcap
2.Transducer connector from housing
3.Battery Disconnect fob connector from the housing
4.Battery power connector from the housing
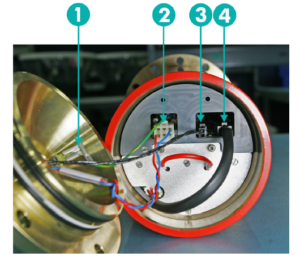
7. Make sure the end cap is kept in a clean dry area and O-rings do not become contaminated.
8. Once the endcap is removed remove the two M3 battery retaining screws.
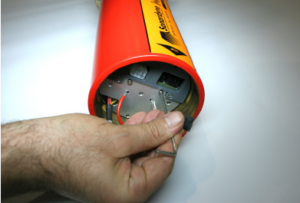
9. Place a finger in the wire loop and carefully pull out the battery.
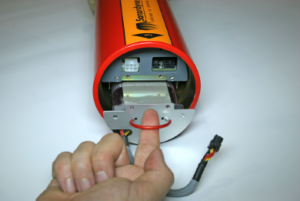
10. Insert the new battery and refit the two M3 battery retaining screws.
11. Refit the transducer cap and connect the transducer, battery disconnect and battery connectors.
Notes
– Alkaline batteries have a shelf life of 5-10 years at room temperature.
– Consult the manual for a full set of safety warnings when changing a battery.
– Always release the pressure relief valve in case internal pressure has built up inside the RT6.
Contact Support@sonardyne.com for more information.
Looking for more content?
Find more product support in our Knowledgebase
Haven't found what you're looking for?
Then speak to one of our team for expert help


