This article describes the procedure for installing Mini- and Micro-Ranger 2 software.
Before you begin, refer to the relevant user manual for prerequisites/hardware requirements and request of copy of the release notes for the software version that you will be upgrading your system to. Confirm your PC meets all the listed hardware requirements and also confirm the HPT and ESH firmware versions; if these require updating, this can be done at a later date.
Note: Be advised that Sonardyne software is only tested and approved using an English version of Windows® 10 operating system.
Mini- and Micro Ranger 2 Installation Procedure
1. Using Windows Explorer, navigate to and save a .cef file from your current Mini- or Micro-Ranger 2 system to the PC (the .cef file stores the system and job information and can be used as a back-up if required).
2. Exit Mini- or Micro-Ranger 2.
3. Upload the software 8251-015-Axx.iso file to the Mini- or Micro-Ranger 2 PC from the Sonardyne FTP (Customer Support can supply instructions) or use the 8251-015-Axx.iso file stored on the Sonardyne supplied memory stick.
4. Exit all other software programs and if possible, temporarily stop all firewall and anti-virus programs.
5. Confirm your Mini- or Micro Ranger 2 security key is installed in one of the USB ports.
6. Uninstall the current Mini- or Micro Ranger 2 software on the PC (if this is a new install, disregard this step).
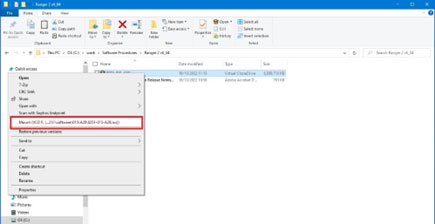
7. Navigate to the folder where the .iso file was saved in step 3. Right-click the .iso file and select Mount. This will mount a virtual drive on your PC.
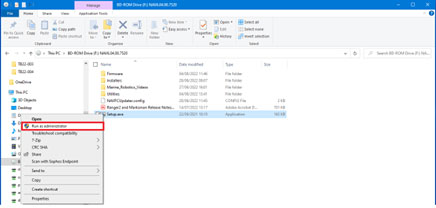
8. Right-click on the setup.exe and select Run as Administrator.
9. Continue through the installation process. If any alerts or errors are displayed, stop the installation and send relevant screenshots to [email protected]
10. When the installation process has completed, check the Mini- or Micro-Ranger 2 system starts up, connects to all external instruments and no unexpected events or alarms are reported. The software installation process should not overwrite the job or system settings. If there are any issues with the setup, please contact [email protected] who can take you through the process of recovering the information from the .cef saved in step 1.
11. If necessary, update the HPT and or ESH firmware to the versions listed in the release notes.
HPT and ESH Firmware Update Procedure
To update the HPT and ESH firmware:
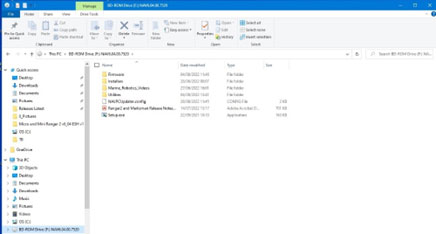
1. Navigate to and locate the firmware in the Firmware folder in the 8251-015-Axx.iso file. Save these files on your PC.
2. The Utilities folders contains the current version of user manuals which have the firmware update procedures, QSG and software programs.
Contact [email protected] for more information.